Sunday, December 20, 2020

Wonky Tree Placemat Tutorial

Here's another last-minute Christmas tutorial, originally shared on the Benartex blog. Small projects feel so much more do-able in December!

The placemat features larger pieces of two focal prints from Cherry Guidry's Mulberry Lane collection (an older collection, FYI), plus a paper pieced wonky Christmas tree. Enjoy the tutorial! 


Materials:
(to make 4 placemats)
1/2 yard aqua tonal
1/3 yard lime print
1/3 yard green print
5/8 yard red dot
1/2 yard street stripe*
5/8 yard circle print*
7/8 yard backing fabric*
(4) 2" squares of fusible web
(4) 14" x 20" batting pieces

*directional fabric; refer to project photos while cutting

Cutting:
From the aqua tonal:
(2) 4-1/2" x 42" strips (for paper piecing)
(2) 1-1/2" x 42" strips; cut into (4) 1-1/2" x 6-1/2" pieces and (8) 1-1/2" x 3" pieces

From the lime print:
(2) 4-1/2" x 42" strips (for paper piecing)

From the green print:
(2) 4-1/2" x 42" strips (for paper piecing)

From the red dot:
(6) 2-1/4" x 42" strips (for binding)
(1) 1-1/2" x 42" strips; cut into (4) 1-1/2" squares
(3) 1-1/4" x 42" strips; cut into (8) 1-1/4" x 12-1/2" lengths (for flange)
Reserve remainder for applique

From the street stripe:
(1) 12-1/2" x 42" strip; cut into (4) 4-1/2" x 12-1/2" pieces so stripe runs horizontally

From the circle print:
(2) 8-1/2" x 42" strips; cut into (4) 8-1/2" x 12-1/2" pieces so circles run horizontally

From the backing fabric:
(2) 14" x 42" strips; cut into (4) 14" x 20" pieces

Make the Placemats:
Note: Click here to download the paper piecing and applique patterns. This tutorial assumes basic knowledge of paper piecing. Use the strips listed in the cutting directions for paper piecing.
1. Cut apart the paper piecing patterns into four separate pieces: A, B, C, and D. Note: When you're paper piecing, make sure the fabric extends at least 1/4" beyond each paper pattern on all sides. You'll need 1/4" on each side for the seam allowance as you assemble the tree unit. 


2. Paper piece the A section, using the lime print for piece #1 and aqua for the #2 and #3 pieces.  Trim sides of section A to 1/4" past the edge of the paper (for seam allowance). 


3. Repeat with sections B, C and D. Sew the units together in alphabetical order, matching raw edges. Remove the paper. 

Here's what your tree should look like: 

4. Sew 1-1/2" x 3" aqua tonal pieces to opposite sides of a 1-1/4" red dot square to make the tree base. Sew the base to the bottom of the tree and sew a 1-1/2" x 6-1/2" aqua tonal piece to the top. Your tree unit should measure 6-1/2" x 12-1/2". 

5. Press (2) 1-1/4" x 12-1/2" red dot strip wrong sides together lengthwise to create (2) flange pieces. Lay a folded strip on a circle print piece as shown, matching raw edges. Pin to secure. 


6. Sew a 4-1/2" x 12-1/2" street stripe piece to the bottom edge of the circle print piece, securing the flange at the same time. Press flange up.

7. Position the second flange along the left edge of the pieced unit with raw edges matching and pin in place. 

8. Sew the tree unit to the left side and press the flange away from the tree. 

9. Layer a backing piece right side down, batting piece, and placemat right side up. Quilt as desired. 

10. Trace the star shape onto the paper side of fusible web. Fuse onto red dot fabric and cut out along the drawn line. Fuse the star to the top of the tree. Blanket stitch to secure. 

11. Trim the quilted piece even with the placemat top. Your placemat should measure approximately 18-1/2" across by 12-1/2" tall. 

12. Repeat steps 1-11 to make a total of (4) placemats.
13. Sew the 2-1/4" x 42" red dot strips short ends together into one long strip. Bind the placemats with these strips and enjoy! 


If you like what you've seen here, you can also find me:
To find all of my quilt patterns, visit my Etsy shop
Find me on IG here.
Find me on Facebook here.
Sign up for my newsletter in the right-hand sidebar.

Saturday, December 19, 2020

Last-Minute Gift Bag Tutorial

 Out of wrapping paper? (I just stocked up yesterday...)

Last year I shared a post for how to make quick and easy gift bag and wine bottle holders using the icy blue Pearl Frost prints from Benartex. 


You can find the tutorial here.

Happy wrapping and/or sewing!

If you like what you've seen here, you can also find me:
To find all of my quilt patterns, visit my Etsy shop
Find me on IG here.
Find me on Facebook here.
Sign up for my newsletter in the right-hand sidebar.


Thursday, December 17, 2020

My One Celebrity Experience

Today's prompt in the 31 Day Blogging Challenge is about a favorite "sewlebrity."

I thought it would be a fun twist to share my fun "sewlebrity" experience, way back from 2007. 

I was the editor for a magazine called the $100,000 Quilting Challenge--a contest in magazine format, that--you guessed it--gave away $100,000 to the winning quilt. Long story short, the winning quilt, quilter, and me, as the magazine's editor, ended up with the opportunity to be on the Today Show. I got my hair and make-up done at the show, and got to wait in the green room (and tried not to throw up from nerves!).

Here's the video of the segment. 

The winning quilt is a gorgeously detailed wholecloth machine quilted by Linda McCuean. The segment was shot outside, in January, on a very windy morning. Quilt holders with white gloves were required to keep the quilt from blowing. Don't miss the horrifying twist at the end. 

So that was my two minutes of being a "celebrity." :) And probably the most interesting experience I never want to do again! 


If you like what you've seen here, you can also find me:
To find all of my quilt patterns, visit my Etsy shop
Find me on IG here.
Find me on Facebook here.
Sign up for my newsletter in the right-hand sidebar.


Wednesday, December 16, 2020

Why Do I Sew? Top 10 List

  Today's prompt in the 31 Day Blog Writing Challenge is a question - why do I sew? 

Like many other quilters, I can tell you it's not so I can hem someone's pants or curtains. 😄 I don't even hem my own pants or curtains (you have to make both legs the same length--scary!). 


I couldn't narrow it down to one simple answer, so I came up with a top ten list. I'm interspersing it with quilt photos for a little eye candy. 

I sew for:
1. The feeling of satisfaction when I finish a project and can say that "I made that."


2. The art of it.


3. That fabulous high of being creative.


4. The thrill of creating something that makes me (and hopefully others) go "wow!"


5. The joy of giving something homemade as a gift.


6. The challenge of trying a new technique.


7. Relaxation.


8. The pleasure of adding something beautiful to the world.


9. The fulfillment of sharing these skills with someone else--either my kids or teaching a class.


10. Fun!


Why do you sew? 

Also, see who else is participating in this challenge put on by Cheryl of Muppin.com. Find the details and links to everyone's blogs here.


If you like what you've seen here, you can also find me:
To find all of my quilt patterns, visit my Etsy shop
Find me on IG here.
Find me on Facebook here.
Sign up for my newsletter in the right-hand sidebar.

Tuesday, December 15, 2020

Sewing with Kids

 My earliest sewing memories involve sewing Cabbage Patch Kid clothes with my mom. :) She (and therefore I) didn't get into quilting until later. When I was a kid, I had free rein to use her sewing machine and to use her stash, and I really enjoyed experimenting. Here's a pic of the earliest finished project I have. It's not a doll quilt; I used it to cover up the digital numbers on my alarm clock. :)


So when I had kids, I knew I wanted to introduce them to one of my favorite hobbies. I have three boys, and if I had a nickel for every time someone asked if I wished I'd had a girl, so I could teach them to sew, I'd have my own longarm. Guess what? Boys can sew too, and like it. 

In fact, I blame then for how messy my sewing studio always is. Which is only half accurate. I started between 4 and 5 years old with each of them, when they expressed interest. We started with improv piecing because 1/4" seam allowances don't matter. Much easier that way! It's fun watching their ideas, and also occasionally frustrating, because they believe anything is possible, and I need to balance not crushing that idea with also pulling them back to what's feasible. 

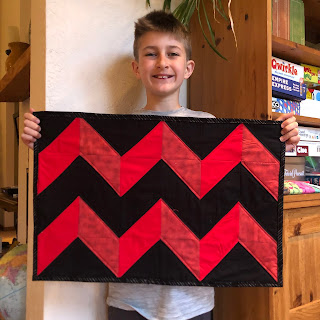
Here's a photo of the quilt my older two boys made for my dad. They made all the blocks except for two, and then I assembled it and machine quilted it. It's both awesome and hurts the eyes all at the same time. 

They've also gone through a Minecraft block phase, zip pouches, pillows, felt softies, and most recently, my Strippy Improv Holiday blocks


I may need to invest in a third sewing machine if they keep this up! :)


If you like what you've seen here, you can also find me:
To find all of my quilt patterns, visit my Etsy shop
Find me on IG here.
Find me on Facebook here.
Sign up for my newsletter in the right-hand sidebar.

Monday, December 14, 2020

Holiday Quilt Round-Up!

 I don't know about you, but this is the time of the year that I start having Christmas quilt envy. And also the time of the year that it's too late to make a quilt for this year. So good timing. :) 

That being said, I'm sharing the various Christmas/holiday quilts that I've designed--you can always get a head start on next year!


It's the holiday season, and there are so many tempting quilt patterns available, and only so many days to make them (on top of the cookie making, gift wrapping, carol singing, etc.). I've had a a lot of fun designing holiday quilt patterns this year--I haven't sewn them all (yet!), but it's wonderful to get a chance to "play" in all these festive fabrics, even if it's sometimes only digitally. 
Here's a rundown of the quilts I've designed and where to find them (some are free patterns to download; some can be purchased).

Twirled Squares
featuring Camp Joy by Benartex
Purchase the pattern here.

featuring Artful Snowflake by Paula Nadelstern for Benartex
Free pattern download here


featuring Uncorked by Another Point of View for Windham Fabrics
Purchase the Ribbon Weave pattern here


featuring Candy Cane Lane by Whistler Studios for Windham Fabrics
Download the free pattern here


featuring Night of the Nutcracker by PBS Fabrics
Free pattern download here


featuring Handmade Holiday by Ampersand Design Studio for PBS Fabrics

Free pattern download here


featuring Scandinavian Christmas by The Tiny Garden for PBS Fabrics
Free pattern download here


And of course my newest seasonal pattern, Strippy Improv Holiday

Purchase the pattern here.


How many holiday quilts do you have? I don't have as many as I want to have! :)

If you like what you've seen here, you can also find me:
To find all of my quilt patterns, visit my Etsy shop
Find me on IG here.
Find me on Facebook here.
Sign up for my newsletter in the right-hand sidebar.

Sunday, December 13, 2020

Color: Favorites and Leasts

 I'm combining the prompts for Days 12 and 13 of the 31 Day Blog Writing Challenge into one: 

Favorite and Least Favorite Colors


Favorite is easy - teal specifically, followed by anything in the cool palette--blues, greens turquoises

This quilt was made using my teal scraps. Didn't have to purchase a thing. 


Least favorite, I'd probably say brown, pink, and peach. 

And if I look at my bins of scraps, they wholeheartedly support these statements. 


Just for fun, I did the Year of Colour assessment to see if it matched my favorites. I have to laugh at the brown and pink that shows up fairly prominently. Oh well...


What are your favorite and least favorite colors? 

If you like what you've seen here, you can also find me:
To find all of my quilt patterns, visit my Etsy shop
Find me on IG here.
Find me on Facebook here.
Sign up for my newsletter in the right-hand sidebar.


Saturday, December 12, 2020

Wonk Around the Block in Indigo!

 This morning I finished up the last workshop session with the Great Lakes Modern Quilt Guild. We've been doing my Wonk Around the Block pattern as a virtual sew along since May, and it's been a lot of fun, and a great way to still be able to sew together even when we're apart. For my demo version for the sew along, I used the gorgeous Indigo Batiks from Anthology Fabrics.


Here's a progression of my quilt through the months: 


Month 1: The wonky center star that starts it all: 


Month 2: Flying geese border + additional borders


Month 3: Wonky Log Cabin blocks


Months 4 : More borders

Month 6: Half Shoo Fly and Wonky Flying Geese for the finish! 

Next up, of course, is quilting! 

I'll share a gallery of everyone's Wonk Around the Block quilts soon--there's so much variety! 

The Wonk Around the Block pattern is available in my Etsy shop.
You can also purchase access to a set of videos that walk you through each section's steps.

If you like what you've seen here, you can also find me:
To find all of my quilt patterns, visit my Etsy shop
Find me on IG here.
Find me on Facebook here.
Sign up for my newsletter in the right-hand sidebar.